Say Goodbye to Traditional WinForms: Build Modern Desktop Apps with Glassmorphism Effects Using WinUI 3
Introduction
Remember those WinForms apps we used to build? Gray borders, square buttons, and monotonous interfaces. In this era where visual appeal matters, users have increasingly high expectations for desktop application aesthetics. The emergence of WinUI 3 has finally empowered .NET developers to effortlessly create modern-looking desktop applications.
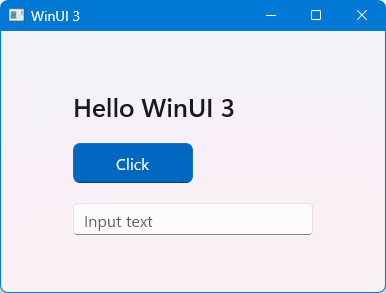
This article will guide you through building a modern desktop application with glassmorphism effects and a custom title bar using WinUI 3, step by step. The final result will rival native Windows 11 applications.
1. Why Choose WinUI 3?
| Feature | WinForm | WPF | WinUI 3 |
|---|---|---|---|
| Fluent Design | ❌ | Requires 3rd party | ✅ Native |
| Mica/Acrylic Material | ❌ | ❌ | ✅ Native |
| Rounded Controls | Custom required | Custom required | ✅ Native |
| Modern Navigation | ❌ | Requires 3rd party | NavigationView |
| Performance | Average | Average | Excellent |
2. Environment Setup
Before you begin, ensure you have installed:
-
Visual Studio 2022 (17.0+)
-
.NET 6 SDK or higher
-
WinUI 3 project template (available via VS Installer)
3. Create a Project and Enable Mica Background
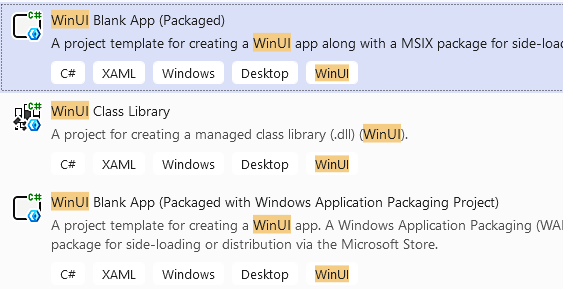
3.1 Create a New Project
Select the "Blank App, Packaged (WinUI 3 in Desktop)" template.
3.2 Enable Mica Material
Mica is a semi-transparent material introduced in Windows 11 that dynamically picks up colors from your desktop wallpaper, creating a sense of depth. Simply add the following to your Window object in XAML:
<Window.SystemBackdrop>
    <MicaBackdrop />
</Window.SystemBackdrop>
4. Customize the Title Bar
Professional applications typically hide the default title bar, allowing content to extend to the top edge.
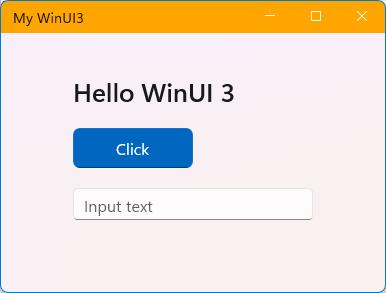
4.1 Create a Custom Title Bar in MainWindow.xaml
<Grid x:Name="AppTitleBar"
      Height="32"
      VerticalAlignment="Top"
      Background="Orange">
    <TextBlock x:Name="TitleTextBlock"
               Text="My WinUI3"
               Margin="12,0,0,0"
               VerticalAlignment="Center"
               Style="{StaticResource CaptionTextBlockStyle}"/>
</Grid>
4.2 Set the Title Bar Drag Region
In your MainWindow.xaml.cs, configure the extension area during initialization:
public MainWindow()
{
    InitializeComponent();
    this.ExtendsContentIntoTitleBar = true;
    SetTitleBar(AppTitleBar);
}
You now have a custom title bar!
5. Core Layout Control Practices
WinUI 3 provides powerful layout controls. Mastering them is the foundation of building modern UIs.
5.1 Grid — Grid Layout
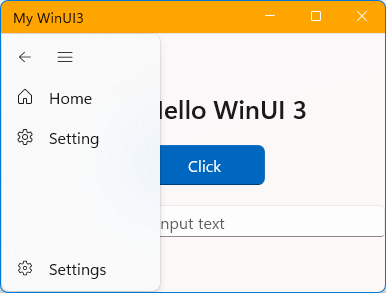
Grid is the most commonly used layout control, ideal for building complex interfaces. The example below defines a two-row layout: the first row for a custom title bar and the second row for a navigation bar:
<Grid>
    <Grid.RowDefinitions>
        <!-- Title bar content -->
        <RowDefinition Height="Auto"/>
        <!-- Navigation bar -->
        <RowDefinition Height="*"/>
    </Grid.RowDefinitions>
    <Grid x:Name="AppTitleBar" Grid.Row="0"/>
    <NavigationView x:Name="AppNavPanel" Grid.Row="1" />
</Grid>
5.2 StackPanel — Simple Stacking
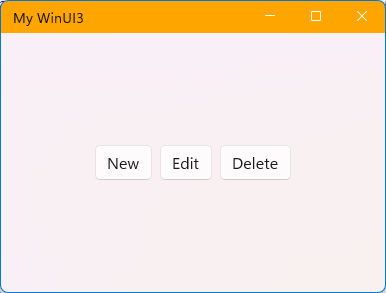
StackPanel is used for simple content stacking, either vertically or horizontally. The following example defines a row of horizontally arranged buttons:
<StackPanel Grid.Row="1"
            Orientation="Horizontal"
            Spacing="8"
            HorizontalAlignment="Center">
    <Button Content="New" />
    <Button Content="Edit" />
    <Button Content="Delete" />
</StackPanel>
5.3 Combination — Card-style List
By combining Grid and StackPanel, you can create card-style interfaces similar to Windows 11 Settings. To add scrolling capability, simply wrap the content with a ScrollViewer. When the ScrollViewer's content exceeds the window boundaries, a scrollbar will be added automatically.

6. Conclusion
WinUI 3 brings an unprecedented modern UI experience to .NET desktop developers. Through this article, you should have learned:
✅ Enable Mica/Acrylic glassmorphism effects
✅ Customize the title bar for a professional look
✅ Build flexible layouts using Grid and StackPanel
✅ Create card-style interfaces
✅ Implement responsive window adaptation
Compared to traditional WinForms, WinUI 3 offers both ease of use and advanced, powerful features. While the advanced features may be complex, the improvements in visual experience and user interaction are tremendous. If you're looking to build an impressive desktop application in 2026, WinUI 3 is an excellent choice.